size guide for road bikes
Summary
Discover the ultimate road bike size guide! Learn how to choose the right frame size, inseam, and riding position for maximum comfort and performance.

Proper road bike sizing is crucial for optimal comfort, performance, and efficiency. Incorrect sizes can lead to discomfort and reduced efficiency. This guide will help you determine the perfect fit through detailed measurements and expert tips, ensuring your riding experience is enjoyable and effective.
Why Proper Bike Size Matters
Proper bike size ensures optimal comfort, performance, and efficiency. A well-fitted bike reduces the risk of discomfort, fatigue, and long-term injuries. It enhances pedaling efficiency, allowing you to ride longer with less strain. Incorrect sizing can lead to poor posture, neck and back pain, and reduced control. A bike that fits correctly maximizes power transfer and handling, making every ride more enjoyable and effective. Investing time in finding the right size is essential for a safe and satisfying cycling experience.

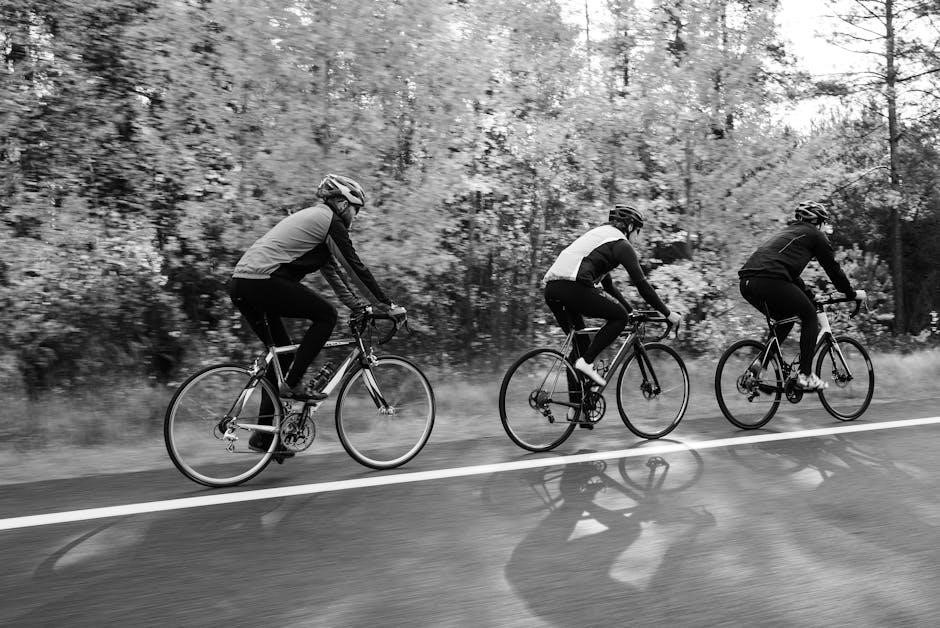
Understanding Road Bike Frame Size
Understanding road bike frame size involves measuring standover height and comparing it with manufacturers’ size charts to ensure a comfortable, efficient, and optimal riding experience for proper fit.
How to Measure Your Bike Frame
To measure your road bike frame, start by locating the seat tube, the vertical tube connecting the pedals to the saddle. Use a tape measure to find the length from the center of the bottom bracket to the top of the seat tube. This measurement determines the frame size. For standover height, measure the distance from the ground to the top of the top tube. Ensure accuracy by keeping the bike on level ground and the tape measure taut. This step is crucial for ensuring proper fit and performance.
Standard Road Bike Frame Sizes
Standard road bike frame sizes typically range from 47cm to 63cm, measured from the center of the bottom bracket to the top of the seat tube. Frames are often categorized as Small (48-52cm), Medium (53-55cm), Large (56-58cm), and Extra-Large (59cm+). These sizes accommodate various rider heights, with Small frames suited for shorter riders and Extra-Large for taller cyclists. Always refer to the manufacturer’s specific size chart, as some brands may vary slightly in their measurements. Proper sizing ensures optimal comfort, efficiency, and handling during rides.
How to Measure Yourself for a Road Bike
To measure yourself, stand tall and record your height. Measure your inseam by placing a book between your legs, then calculate your standover height. Use a bike size calculator or manufacturer’s guide for accurate sizing, ensuring a precise fit for comfort and performance.
Key Body Measurements for Bike Sizing
Your height, inseam, and arm length are essential for determining the right bike size. Measure your height accurately and calculate your standover height by subtracting 1-2 inches. Inseam is crucial for frame size, while arm length affects handlebar reach. Ensure precise measurements for a comfortable and efficient ride. Use these metrics to compare with manufacturer charts or bike size calculators for the best fit. Proper alignment enhances performance and reduces discomfort, making accurate measurements vital.
How to Calculate Your Ideal Standover Height
To find your ideal standover height, stand over the bike with feet flat and measure the space between the crotch and frame. For road bikes, a 1-2 inch clearance is optimal, ensuring comfort and safety. This gap allows easy dismounting and prevents discomfort or injury. Use this measurement to match your body proportions with the frame size, ensuring a perfect fit for efficient and enjoyable riding. Proper standover height is crucial for both performance and comfort on the road.
Road Bike Size Charts
Road bike size charts match rider height to frame size, ensuring optimal fit. They provide a standardized guide to help riders choose the correct bike size for comfort and performance. Manufacturers often vary in sizing, so comparing charts is essential for accuracy. Use these charts to determine your ideal frame size based on height and riding preferences for a precise fit. Proper sizing enhances efficiency, comfort, and overall cycling enjoyment.
Height-to-Frame Size Conversion Guide
Matching your height to the correct road bike frame size is fundamental for a comfortable ride. Use a height-to-frame size conversion guide to determine your ideal fit. Typically, riders between 5’2″ and 5’6″ opt for a 50-52cm frame, while those 5’7″ to 5’11” prefer 53-55cm. Taller riders (6′ and above) usually choose 56-58cm frames. Always measure your height accurately and consult the specific manufacturer’s chart, as sizes can vary slightly between brands. Proper sizing ensures efficiency, comfort, and optimal performance on the road.
Size Charts for Different Manufacturer Standards
Road bike manufacturers often have unique sizing standards, making direct comparisons challenging. Brands like Trek, Specialized, and Giant may differ in their frame size charts. Some use numerical sizing, while others opt for small, medium, or large designations. Always consult the specific manufacturer’s size chart, as even similar frame sizes can vary between brands. Using the manufacturer’s recommended sizing guide ensures the best fit for your body type and riding style.

Frame Geometry and Fit
Frame geometry significantly impacts comfort and performance. Understanding stack height, reach, and seat tube angles helps ensure proper alignment and optimal riding position. Adjustments refine the fit.

Understanding Stack and Reach Measurements
Stack and reach are critical measurements for road bike fit. Stack refers to the vertical distance from the bottom bracket to the top of the headset, while reach is the horizontal distance from the center of the bottom bracket to the center of the headtube. These measurements determine your riding position, affecting comfort, aerodynamics, and control. A balanced stack and reach ensure optimal weight distribution, reducing strain on your back and shoulders. Proper alignment enhances efficiency and handling, making these measurements vital for a customized fit.
Seat Tube vs. Top Tube: What’s the Difference?
The seat tube and top tube are key components of a road bike frame, each serving distinct purposes. The seat tube connects the bottom bracket to the saddle, while the top tube links the headtube to the seat tube, influencing handling and comfort. Traditionally, the seat tube was the primary measurement for sizing, but modern frames often prioritize the top tube for a more accurate fit, ensuring optimal rider position and performance. Understanding both helps in selecting the right frame for your riding style and body proportions.

Sizing Up or Down
Sizing up offers stability and comfort, while sizing down enhances agility and responsiveness. Consider your riding style, body proportions, and personal comfort to make the best choice.
Pros and Cons of Choosing a Larger or Smaller Frame
A larger frame offers more comfort and stability, ideal for long rides, but may feel bulky. A smaller frame provides better maneuverability and lighter weight, suited for agility. Riders with longer torsos may prefer larger frames, while shorter riders benefit from smaller ones. Test rides are essential to determine the best fit, balancing comfort and performance based on personal needs and riding style.
Using a Bike Size Calculator for Precision
A bike size calculator is a valuable tool for determining your ideal road bike size. By inputting key measurements like height, inseam, and arm length, it provides a personalized frame size recommendation. This ensures a precise fit, optimizing comfort and performance. While calculators are highly accurate, they should be used alongside test rides to confirm the best fit. Manufacturers may vary in sizing standards, so cross-referencing with their specific charts is recommended for the most accurate result.
Adjusting Your Bike for the Perfect Fit
Adjusting your road bike involves setting the saddle height for a slight knee bend, positioning the seat for proper foot reach, and setting handlebars at a comfortable height. Small adjustments followed by test rides ensure optimal comfort and performance.
How to Fine-Tune Handlebar Height and Reach
Fine-tuning handlebar height and reach ensures optimal comfort and control. Start by adjusting the stem height to achieve a slight bend in your elbows, keeping your spine neutral. Measure the horizontal distance from the saddle to the handlebars to match your body proportions. Experiment with different stem lengths or angles to find your preferred position. Test ride your bike to ensure the setup feels natural and comfortable, making small adjustments as needed for the perfect balance of performance and comfort.
Seat Height and Position for Maximum Comfort
Proper seat height and position are essential for comfort and efficiency. Set the saddle height so that when your heel touches the pedal, your leg is fully extended, with a slight bend when riding. The saddle should be level or slightly tilted to prevent discomfort. Adjust the fore-aft position to ensure proper weight distribution, with your knee over the pedal spindle when the crank is forward; Test the setup during a ride to ensure optimal comfort and make fine adjustments as needed for the perfect fit.
Test Rides and Final Adjustments
A test ride is essential to ensure the bike feels comfortable and performs well. Check the fit, saddle height, and handlebar reach during the ride. Fine-tune the setup based on your experience for the perfect balance of comfort and performance.
Why Test Rides Are Essential
A test ride is crucial to confirm that your chosen road bike fits perfectly and meets your riding needs. It allows you to assess comfort, handling, and performance in real-world conditions. Even if the size chart suggests a specific frame, the actual feel of the bike can vary. During a test ride, pay attention to factors like seat height, handlebar reach, and overall ergonomics. This hands-on experience ensures your bike is tailored to your body and riding style, avoiding potential discomfort or inefficiency.
What to Look for During a Test Ride

During a test ride, focus on comfort and ergonomics. Ensure your legs almost fully extend at the pedal’s lowest point and your hands can comfortably reach the handlebars. Check for any strain in your neck or back. Test the bike’s responsiveness by accelerating and braking. Pay attention to how the frame feels—sturdy yet agile. Also, assess the saddle comfort and overall balance. These observations will help you determine if the bike is the right fit for your body and riding preferences.
Selecting the right road bike size ensures comfort, efficiency, and enjoyment. Use size charts, test rides, and expert advice to make an informed decision. Happy cycling!
Final Tips for Buying the Right Size Road Bike
When purchasing, use a bike size calculator for precision and test ride bikes to ensure comfort. Consult with experts to confirm your fit and review manufacturer size guides. Prioritize your riding style and personal comfort when deciding. Don’t hesitate to seek professional bike fitters for optimal adjustments. Remember, a well-fitting bike enhances performance and enjoyment. Take your time, and don’t rush the process to ensure the best fit for your needs.