singer sewing machine 99k instruction manual
Summary
Download the Singer Sewing Machine 99K instruction manual for easy operation. Learn tips, troubleshooting, and maintenance with our clear guide.

The Singer Sewing Machine 99K is a portable, durable, and versatile sewing machine designed for both beginners and experienced sewists. It offers multiple stitch options, ease of use, and is ideal for various sewing projects, including home decor, repairs, and crafts. Known for its reliability and efficiency, the 99K model provides a seamless sewing experience.
1.1. Overview of the Singer 99K Model
The Singer 99K is a mechanical sewing machine designed for durability and ease of use. It features a sturdy metal frame, making it suitable for heavy-duty sewing. With its intuitive design, it caters to both beginners and experienced sewists. The machine is ideal for sewing various fabrics, from delicate cotton to thicker materials, offering consistent stitching and reliability for everyday projects.
1.2. Key Features and Benefits
The Singer 99K boasts a robust metal frame, ensuring stability during operation. It offers multiple stitch options, including straight and zigzag, and a free-arm design for versatile sewing. The machine’s ease of use, portability, and durability make it ideal for various projects. Its adjustable stitch length and width provide customization, while the included accessories enhance functionality, making it a reliable choice for sewists of all skill levels.
Safety Precautions and Setup
Always ensure loose clothing and long hair are tied back. Keep children away while operating. Avoid sewing over pins or flammable materials. Use the machine on a stable, flat surface and unplug it when not in use. Proper setup and precautions ensure safe and efficient sewing experiences.
2.1. Unpacking and Initial Inspection
When unpacking, carefully remove the machine from the box and inspect for any visible damage. Check all parts, including the power cord, accessories, and manual. Ensure the machine is clean and free from packaging debris. Verify that all components are included and undamaged before proceeding with setup. This step ensures everything is in order for safe operation.
2.2. Placing the Machine on a Table or Cabinet
Place the Singer 99K on a stable, flat surface, such as a sewing table or cabinet. Ensure the area is well-lit and free from clutter. Avoid direct sunlight or moisture exposure. Position the machine firmly to prevent vibration during use. For optimal comfort, align the machine at a comfortable height, allowing easy access to controls. A dedicated sewing table with storage can enhance workflow efficiency.
2.3. Ensuring Proper Ventilation and Power Supply
Ensure the Singer 99K is placed in a well-ventilated area to prevent dust buildup. Keep it away from direct sunlight and moisture. Use a grounded power outlet and avoid extension cords to maintain stable power. Ensure the power supply matches the machine’s voltage requirements. Proper ventilation and power supply are crucial for optimal performance and longevity of the machine.

Understanding the Machine Parts
Understanding the Singer 99K’s parts is essential for effective use. Key components include the needle, bobbin, and stitch selector. Familiarize yourself with each part for optimal sewing performance.
3.1. Identifying the Major Components
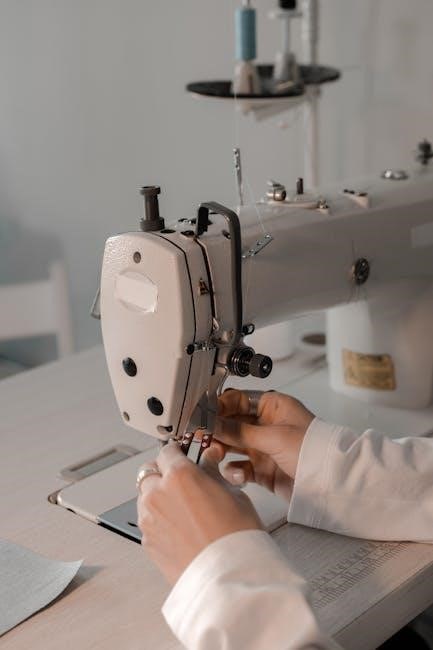
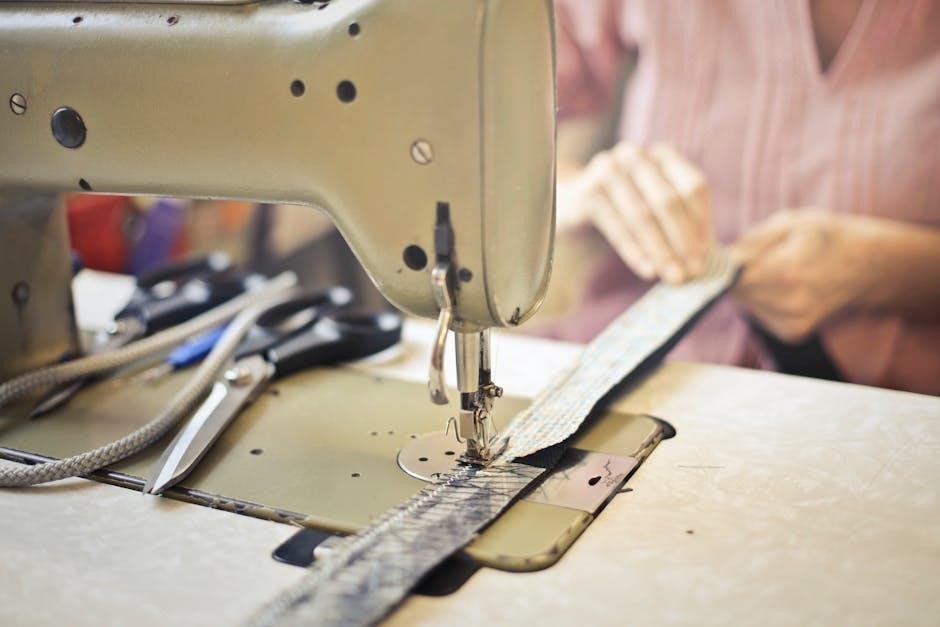
The Singer 99K features several key components. The needle is central for stitching, while the bobbin holds the lower thread. The stitch selector allows choosing from various patterns. The tension discs regulate thread tightness, ensuring even stitching. Additionally, the presser foot secures fabric during sewing. Familiarizing yourself with these parts enhances your sewing experience and troubleshooting abilities. Proper identification ensures efficient operation and maintenance of the machine.
3.2. Accessories Included with the Singer 99K
The Singer 99K comes with essential accessories to enhance your sewing experience. These include multiple presser feet for various tasks, such as general sewing and zipper installation. Additional items like bobbins, needles, and a seam ripper are provided for convenience. The package may also include an edge guide for straight stitching and a lint brush for machine maintenance. These accessories ensure versatility and ease of use for different sewing projects.
Threading and Setting Up the Machine
Proper threading and setup are crucial for smooth operation. Follow the guide to correctly thread the machine, ensuring the spool, tension, and bobbin are aligned. This ensures consistent stitching and prevents issues.
4.1. Step-by-Step Guide to Threading the Machine
To thread the Singer 99K, start by removing the spool and cutting a fresh piece of thread. Insert the thread through the tension disc, then guide it through the take-up lever and the needle. Pull gently to ensure it seats properly. Use the built-in diagram on the machine for reference. Proper threading ensures smooth stitching and prevents tangles or breakage. Always double-check before sewing.
4.2. Properly Inserting and Threading the Bobbin
Remove the bobbin case and insert the bobbin, ensuring the thread unwinds clockwise. Guide the thread through the bobbin tension spring, then pull gently to seat it. Reattach the bobbin case, ensuring it clicks into place. Check alignment and test with a few stitches to confirm proper threading. This ensures consistent stitch formation and prevents issues during sewing.
Basic Sewing Operations
The Singer 99K allows you to start sewing effortlessly. Select the desired stitch, place fabric under the presser foot, and begin. Ideal for straight lines, curves, and repairs.
5.1. Selecting the Right Stitch Type
The Singer 99K offers various stitch options for different sewing tasks. Choose straight stitches for basic sewing, zigzag for elastic fabrics, or decorative stitches for embellishments. Selecting the right stitch ensures professional results and prevents fabric damage. Always match the stitch type to your fabric weight and project requirements for optimal outcomes.
5.2. Adjusting Stitch Length and Width
The Singer 99K allows precise adjustment of stitch length and width to suit various fabrics. Use the dial to modify settings, ensuring stitches are balanced for lightweight or heavy materials. Proper adjustment prevents fabric stretching and ensures tight, even stitching. Always test settings on scrap fabric before sewing your final project for desired results.
5.3. Starting and Stopping the Machine
To start the Singer 99K, ensure it’s plugged in and the power switch is turned on. Use the foot pedal or start/stop button for control. For stopping, release the pedal or press the stop button. Always engage the reverse stitch before stopping to secure seams. Turn off the machine and unplug it when not in use to ensure safety and energy efficiency.
Advanced Features and Techniques
The Singer 99K offers advanced sewing options, including adjustable stitch width and length, reverse stitching, and specialized presser feet. These features enable precise control and versatility for complex projects.
6.1. Using the Reverse Stitch Function
The reverse stitch function on the Singer 99K allows for backward sewing, reinforcing seams. Engage it by pressing the reverse button. It ensures secure stitching, especially at the start or end of seams, preventing unraveling. This feature is ideal for heavy fabrics and thick layers, enhancing durability in professional and home sewing projects. It’s easy to use and improves stitch quality.
6.2. Sewing Different Fabrics and Thicknesses
The Singer 99K handles various fabrics effortlessly, from delicate cotton to thick denim. Adjust the stitch length and tension for optimal results. Use the appropriate presser foot for each fabric type. For heavy-duty materials, the machine’s robust design ensures smooth operation. This versatility makes it suitable for both lightweight and heavy-duty sewing projects, ensuring professional-grade results every time.
Troubleshooting Common Issues
Common issues like thread breakage or improper stitching can often be resolved by checking thread tension, ensuring proper fabric alignment, and consulting the manual for guidance.
7.1. Machine Not Turning On
If the Singer 99K won’t turn on, first check the power cord connection to both the machine and the outlet. Ensure the outlet is functioning by testing it with another device. Verify that the power switch is engaged and not damaged. If issues persist, consult the manual or contact Singer support for professional assistance.
7.2. Thread Breakage or Tension Problems
If thread breaks or tension issues occur, check the upper thread for proper tension and ensure it’s correctly threaded through the machine. Verify the bobbin is seated and threaded properly. Adjust the tension dials as needed, and clean lint from the machine to prevent friction. If problems persist, consult the manual for detailed troubleshooting steps or contact Singer support.
7.3. Incorrect Stitch Formation
Incorrect stitch formation can occur due to improper threading, wrong tension settings, or misaligned fabric. Check that the upper thread and bobbin are correctly threaded and seated. Adjust the tension dials to ensure even stitching. Select the appropriate stitch type for your fabric. If issues persist, clean the machine and ensure the presser foot is properly attached. Consult the manual for additional guidance.
Maintenance and Cleaning
Regular maintenance ensures optimal performance and extends the machine’s life. Clean dust and debris from the machine and bobbin area. Oil moving parts as instructed;
8.1. Regular Cleaning of the Machine
To maintain your Singer 99K, turn it off and unplug it. Gently remove any debris or lint from the machine using a soft brush or cloth. Pay attention to the bobbin area and feed dogs, as these accumulate dust easily. Regular cleaning prevents thread breakage and ensures smooth operation. Avoid harsh chemicals; a dry cloth is usually sufficient for routine maintenance.
8.2. Oiling the Machine Components
Regularly oil the Singer 99K’s metal components to maintain smooth operation. Locate the oiling points, such as the shuttle hook and gear areas. Use high-quality sewing machine oil, applying a few drops as directed. Gently wipe off excess oil with a clean cloth to prevent lint buildup. Proper lubrication reduces friction and ensures the machine runs efficiently, extending its lifespan and performance quality.
Accessories and Optional Attachments
The Singer 99K comes with essential accessories like presser feet, bobbins, and a sewing needle set. Optional attachments include a zipper foot, blind hem foot, and quilting extensions for enhanced functionality.
9.1. Presser Feet for Specific Tasks
The Singer 99K includes various presser feet, each designed for specific sewing tasks. The all-purpose foot is ideal for straight stitching, while the zipper foot allows for precise zipper installation. The blind hem foot is perfect for creating invisible hems, and the buttonhole foot simplifies buttonhole sewing. Additional feet like the quilting foot enhance creativity and precision in larger projects. Proper foot selection ensures professional-grade results and expands the machine’s versatility for any fabric or design.
9.2; Additional Accessories for Enhanced Functionality
The Singer 99K offers optional accessories to enhance sewing efficiency. Additional presser feet cater to specialized tasks, while a dust cover protects the machine. Extra bobbins and needles ensure readiness for diverse projects. A sewing light attachment improves visibility, and a storage case keeps accessories organized. These tools expand the machine’s capabilities, making it adaptable for complex or large-scale sewing endeavors with ease and precision.

Tips for Common Sewing Projects
For common sewing projects, use appropriate fabric and thread types. Backstitch at the start and end for durability. Use a walking foot for thick fabrics and Teflon foot for smooth glide. Match thread color to fabric for a professional finish. These tips enhance your sewing experience on the Singer 99K.
10.1. Sewing Straight Lines and Curves
For sewing straight lines, align fabric edges carefully and maintain steady tension. Use the machine’s built-in guides to ensure accuracy. When sewing curves, gently guide the fabric, adjusting the direction as needed. Keep the fabric moving smoothly at a consistent pace. Use a walking foot for thick fabrics to maintain even feeding. This technique ensures professional-looking results on the Singer 99K.
10.2. Hemming Pants and Skirts
Start by folding the raw edge of the hem up by 1/4 inch, then another 1/4 inch, and press to create a crisp fold. This helps in getting a clean hemline; Next, align the folded edge with the machine’s edge guide to maintain consistency. Using a straight stitch or blind hem stitch is ideal for hemming pants and skirts on the Singer 99K. Adjust the stitch length based on the fabric thickness for optimal results. To achieve a professional finish, consider using a twin needle, which creates a straight line on the right side and a zigzag on the underside, preventing fraying. Ensure the hem allowance is even throughout to maintain a balanced look. Remember to backstitch at the beginning and end of the hem to secure the stitching in place. This technique ensures durable and neat hems for your garments.
The Singer 99K sewing machine offers durability, versatility, and ease of use, making it ideal for various sewing projects. Refer to the warranty for coverage details and support options, ensuring your machine remains in optimal condition for years of reliable service and creative sewing experiences.
11.1. Storing the Machine Properly
To maintain the Singer 99K’s performance, store it in a clean, dry place away from direct sunlight and moisture. Use a protective cover to prevent dust buildup. Ensure the machine is turned off and unplugged before storage. Avoid extreme temperatures or humidity. Store accessories separately in a provided case. Keep the machine out of children’s reach for safety.
11.2. Understanding the Warranty and Support
The Singer 99K sewing machine comes with a limited warranty covering parts and labor for up to 5 years, depending on the component. For details, refer to the warranty certificate. Singer provides customer support through their official website, phone, or email. Users can access troubleshooting guides, repair services, and maintenance tips. Register your machine to validate the warranty and ensure optimal support.